Area: Horticulture Mechanics
Unit:
Irrigation, Pipe and Tubing
LESSON # 7: Join PVC Pipe
COMPETENCY:
To
construct a sprinkler project.
Irrigation installation is a key component for the landscaping industry.
Need:
Students
can develop an S.A.E. program designing and installing irrigation/sprinkler
systems.
The skill can be used in Ag. Mechanics career development events.
LESSON OBJECTIVES:
1.
Using a PVC cutter, reamer, PVC primer, and PVC glue, to cut ream and join PVC
Pipe.
INTRODUCTION:
1) Review previous lesson
2) Interest approach/Realia .Sprinkler project
3) Leading questions
DEMONSTRATION:
1.
Teacher does and tells and also asks questions about tools and uses 2. Student
does and teacher tells and asks questions
SUPERVISED
PRACTICE:
1.
Hand out job operations sheets.
2. Be sure that job operation sheets go into notebooks, and students follow the
job operation.
3. Be sure safety practices are followed.
4. Circulate to each group to assist students.
1.
Review lesson based on objectives
2. Relate to next lesson -Sweat Soldering Copper Tubing
APPLICATION
1.
Sufficient equipment available to break students up into three groups.
2. Completion of the evaluation from on the job operations sheet will be
required for each student.
3. Students not meeting minimum standards will be required to repeat
operation.
4. Each student must submit a solvent welded pipe and fItting with the
evaluation.
MATERIALS
NEEDED:
PVC
pipe cutter with reamer
1/2. PVC Pipe
PVC
Primer
1/2. PVC Fitting
PVC Solvent
REALIA:
Sprinkler
Project
SCIENCE/MATH
CONCEPTS:
Science
-Fusion of plastics
return
to top
JOB OPERATION SHEET
AREA:
UNIT:
Irrigation, Pipe, and Tubing
JOB:
Joining PVC Pipe and PVC Pipe Fittings
OBJECTIVES:
Using
a PVC cutter, reamer, PVC primer, and PVC glue, to cut, ream and join PVC
pipe.
| TOOLS |
MATERIALS |
REFERENCE |
|
PVC
Pipe Cutter with Reamer
PVC Primer
PVC Solvent |
1/2" PVC
Pipe
1/2" PVC Fitting |
|
|
Steps
of Procedure |
Key
Points |
| A.
Cutting and preparing pipe for gluing |
1 Using a
tape measure, place a pencil mark where the cut is to be made on the
pipe.
2. Using the PVC pipe cutter, spread the handles completely open.
3. Place the blade of the cutter directly over the pencil mark on the
PVC pipe.
4. Squeeze the pipe cutter handles a number of times until the blade of the cutter cuts
through the pipe.
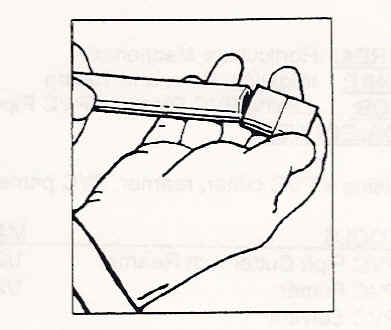
5. Using the reamer on the pipe cutter, ream the inside edge of the pipe
by twisting the reamer back and forth.
6.
Place the reamer on the outside edge of the pipe and ream the
outside using the same procedure.
7. Check
the pipe for fit with the fitting.
|
a. To ensure
a straight cut, make sure the cutter blade passes through the pipe
in a straight line, perpendicular to the pipe.
a.
CAUTION: The reamer may be inside sharp, do not cut
yourself!
b. Make sure all burrs are removed from the edge of the pipe. This is
important for a good fit.
a. The edge of the pipe should have a slight bevel when done.
 |
|
B.
Priming and Gluing the Pipe |
|
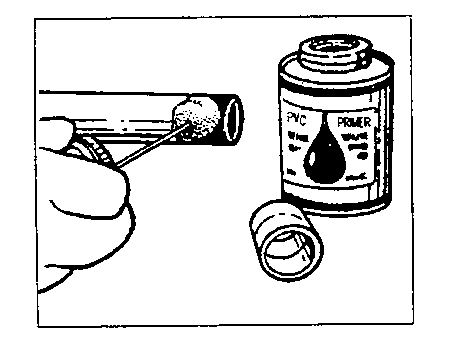
1.
Using the dauber attached to the primer can the lid, apply a thin
coating of primer to the fitting and pipe then to the pipe
end.

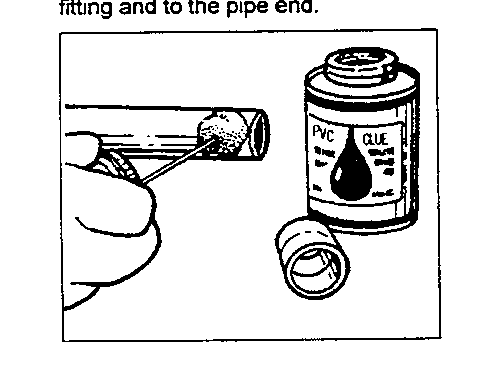
2. Using
dauber applicator attached to glue can lid, apply a thin coat of cement to
fitting and to the pipe end.

3. Quickly insert the pipe into the fitting and turn the pipe
1/4" inch.
4. Wipe off excess glue.
|
a. The primer
is used to clean and help the glue bond to the plastic.
b. Only a thin coat of primer is needed.
c. Remove excess primer from -- dauber.
d. Caution: Fumes are toxic and flammable. Do not breathe and keep away
from flame.
a. Remove excess glue from the dauber.
b. Ensure complete coverage over pipe and
inside fitting.
a. Hold the pipe in the fitting for 30 seconds. This is
done so the pipe is not pushed out of the fitting by the glue.
|
Name___________________
EVALUATION
Joining PVC Pipe and PVC Pipe Fittings

 The University of Arizona
![]()