Linking Data to a Point
Shapefile
Once a point shapefile has been created, we want
to be able to link it to data in a table. The shapefile should have an
ID label for each point. This will be used to label data from samples collected
from that location and to link that data to the shapefile.
For example, suppose there were Aspergillus
flavus propagule density data from the three locations used in the
shapefile created in Step 2 method 1. Hypothetical data are shown
in an Access database file to illustrate the table:
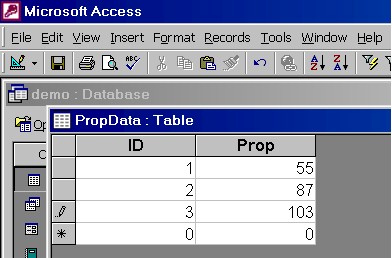
The PropData table can be exported as a .dbf file
and imported into the ArcView Project using the procedures described in
Step
2 method 2.
Open the view in ArcView showing the point shapefile
of the sample locations, highlight the shapefile in the table of contents,
and press the table icon to show the table for the point file.

Choose Windows --> Tile to display both the shapefile
table and the PropData table on the same screen.
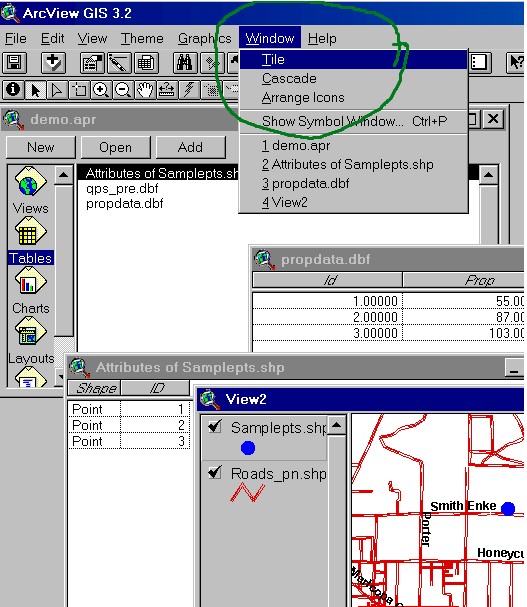
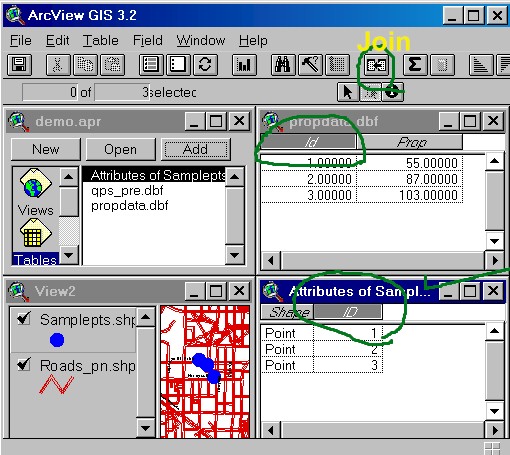
First, go to the propdata.dbf window (upper right
in figure below) and press the Id field button so that it darkens.
Then, make the window labeled "Attributes of Samplepts.shp" active (shown
with window bar in blue in the lower right window below), press the
ID button in that table, and then press the Join button on the main tool
bar.
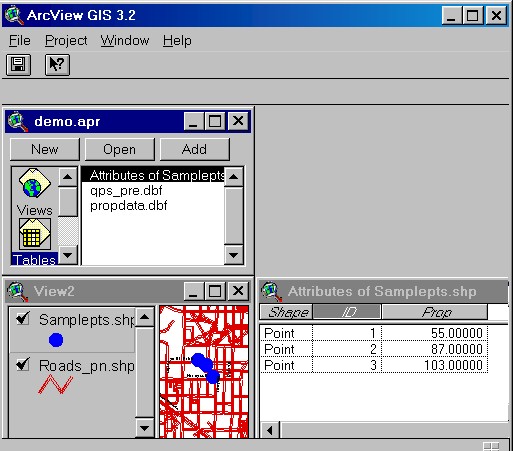
This causes the propdata.dbf data to be joined
to the shapefile.
The newly joined prop data can then be displayed
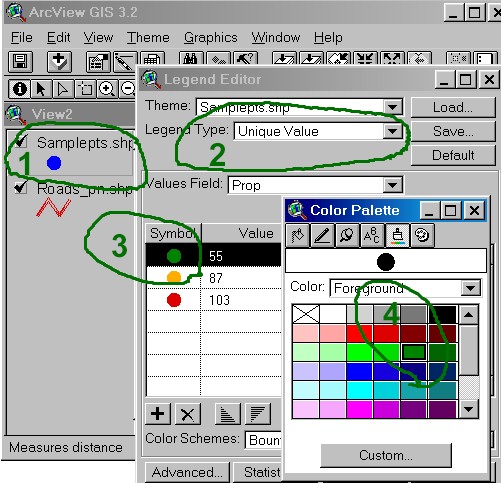
in the view as a point map using the following steps (see figure below):
1. Double click on the shapefile in the view table
of contents.
2. Select the appropriate legend type (either
unique value or graduated color).
3. To change symbol color or shape, double click
on the symbol and the palettes for markers and color will be displayed.
4. Press the paint brush icon for the color palette
and select the desired color.
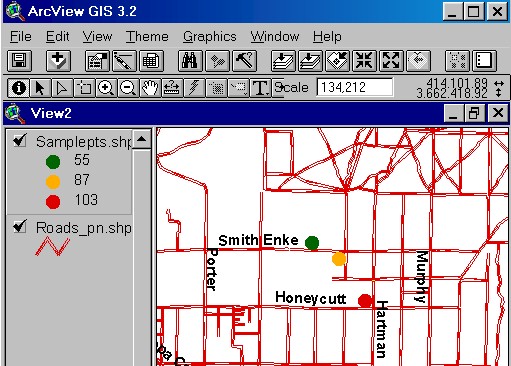
The result is the following point display of the
values linked to the shapefile from the Access database using the sample
ID to link the tables.
Return to the previous page