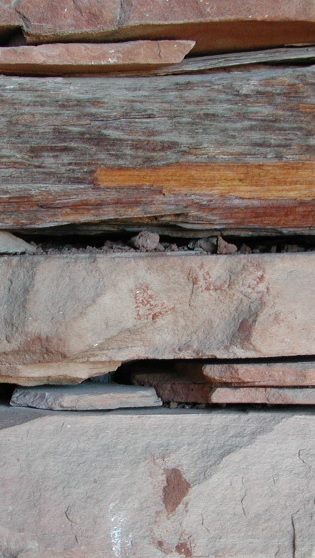
 Building Stone Walls - January 6, 2016 Jeff Schalau, Agent, Agriculture & Natural Resources University of Arizona Cooperative Extension, Yavapai County Arizona has many areas with abundant stone suitable for construction – you only need look at the prehistoric buildings and ruins present across wide areas of the state. Some of these structures are still in use. Others are protected by the Antiquities Act of 1906. Early settlers often built walls, root cellars, foundations, smokehouses, and other structural features from local stone. It is a building material that stands the test of time. Gardeners often curse the abundance of stone because its presence usually translates into a lack of arable soil. Modify your perspective and you might begin to view it as a resource. Sedimentary rocks, such as sandstone (also called flagstone) and limestone, are among the easiest native stone types to use for construction because they are often “bedded”: having been laid down in horizontal layers resulting in flat, parallel rock surfaces. These can be split along the bedded surfaces making it possible to have uniform thicknesses. Igneous and metamorphosed rock types are a little trickier because they tend to have odd shapes and angles. These require more thought and must be fitted together by trial and error. In case you were not aware, sandstone is mined in Yavapai County (near Ashfork and south of Williams) and can be purchased from local stone yards. Of course, Sedona has abundant sandstone too. Limestone is common in some areas of the Verde Valley (Rimrock, Lake Montezuma, and Jerome) and you have likely seen retaining walls built from limestone in and around Jerome. Granite and basalt are igneous rocks found in many areas of Northern Arizona. “Tuff” (rock formed from volcanic ash) deposits are near Kirkland, AZ where this porous rock was used in the construction of many old buildings (and mined for kitty litter). If you have rock on your property, I’m hoping you begin to see it as a resource. Retaining walls are often needed to prevent erosion and create planting areas. This method describes a “dry stack” design where the weight of the rock and the angle of repose hold the stones in place. The first step in building a native stone retaining wall is to line out the wall location with stakes and a string line. Curves in the wall should be minimal. Next, dig a 1 foot deep trench and place a 3-4 inch gravel layer at the bottom of the trench. The gravel should be tamped down with a hand tamper or plate compactor. If the wall is going to be larger than 3 feet high, perforated drainage pipe should be placed behind the base course and then covered with drainage aggregate. Hydraulic stone splitters are available, but a sledge and a stone chisel can be used to shape rocks for most flagstone paver work and to roughly shape odd pieces of rock for retaining walls. Wear safety glasses when chiseling stone pieces. For retaining walls, lay a bottom course using larger stones if possible. Stack the second course on top of the base course. Pick stones that fit well with those on either side. If there are large gaps, it may be necessary to use the hammer and chisel to get a more snug fit. Additionally, each course should be set back at least 3/4 inch to allow the wall to lean back into the ground that it will be retaining. Oftentimes the stones will not lay perfectly level on the preceding course. These stones can be shimmed with rock chips or gravel on the backs of the stones to eliminate wobbling. After stacking two or three courses, backfill the wall with soil or drainage aggregate. This is certainly where artistry and patience are combined to create a natural and durable wall. My first retaining walls were made from granite collected from my property to create some small terraces for fruit trees. These have lasted well for the most part – some had to be reconstructed. My biggest project was a granite retaining wall around a 20 by 25 foot terrace which contains my vegetable garden. Some stones at the base of the wall weighed 150 to 200 pounds and need to be placed with a digging bar and wooden skids. I used smaller rocks as I built it up making sure the rocks were held in place by gravity and fitted well with their neighbors. It is not a work of art, but it has served its purpose for 15 years. I have included several resources that describe rock wall construction below. Follow the Backyard Gardener on Twitter – use the link on the BYG website. If you have other gardening questions, call the Master Gardener help line in the Camp Verde office at 928-554-8992 or e-mail us at verdevalleymg@gmail.com and be sure to include your name, address and phone number. Find past Backyard Gardener columns or provide feedback at the Backyard Gardener web site: http://cals.arizona.edu/yavapai/anr/hort/byg/. Additional Resources Natural Stone Retaining Walls University of Minnesota Extension www.extension.umn.edu/garden/landscaping/implement/stone_walls.html Dry Stacked Stone Walls The Field: American Society of Landscape Architects thefield.asla.org/2015/03/24/dry-stacked-stone-walls/ Retaining Walls: Design Considerations Colorado State University Extension www.ext.colostate.edu/ptlk/1118.html How To Build A Dry Stone Wall The Stone Trust thestonetrust.org/resources/how-to/ |